Aeg-Electrolux LAVALOGIC1820 User Manual
Browse online or download User Manual for Washing machines Aeg-Electrolux LAVALOGIC1820. Aeg-Electrolux LAVALOGIC1820 User Manual
- Page / 44
- Table of contents
- BOOKMARKS
- LAVAMAT 1
- LAVALOGIC 1820 1
- 1 Safety instructions 2
- 3 Useful tips and hints 2
- 2 Environmental information 2
- Contents 3
- Operating Instructions 5
- 1 Safety 5
- Disposal 6
- 2 Old appliance 6
- – setting the language 7
- Description of the appliance 8
- Main control features 9
- Programme overview 10
- Before the first wash 14
- Preparing and sorting washing 14
- Running a washing cycle 15
- 3 Before switching the appli 15
- 3 RINSE HOLD means: the 15
- Selecting options 16
- TIME SAVING 17
- DELAY START 17
- SENSITIVE/STAIN/PRE WASH 17
- DELICATES 30°C 18
- Adding detergent/conditioner 19
- Starting a programme 20
- Programme progress 20
- Setting extra options 22
- RINSE+, GENTLE SPIN 24
- LANGUAGE 24
- Child safety device 25
- Cleaning and maintenance 26
- What to do if 27
- compart 28
- Drain pump 32
- Technical data 33
- Consumption values 33
- Installing the appliance 35
- Where to install 36
- Making the appliance level 37
- Electrical connection 38
- Water inflow 39
- 1 Important! 40
- Guarantee/Customer Service 41
Summary of Contents
LAVAMAT LAVALOGIC 1820Washing machineUser information
10Programme overviewProgrammemax. load(dry washing)Options Spin speedTIME SAVINGDELAY STARTSENSITIVESTAINPRE WASH18001600/140012001000/800/600/400RINS
11Use/FeaturesCare-symbols1)1) The figures in the care symbols indicate the maximum temperatures.General programme for coloured and easy-care items ma
12 Programmemax. load 1) (dry washing) 1) A 10 litre bucket contains approximately 2.5 kg of dry washing (cotton).Options Spin speedTIME SAVINGDELAY S
13Use/FeaturesCare-symbols1)1) The figures in the care symbols indicate the maximum temperatures.Gentle special programme for fabrics such as viscose,
14Before the first washSetting the timeSo that the current time and the end of the programme are correctly displayed, please check the display and set
15Running a washing cycleSwitching on the appliance Press the control knob.The appliance is now switched on.3 Before switching the appli-ance on, make
16Selecting optionsYou can select different options on top of the programme that has been selected. Only options that can be combined with the program
17TIME SAVING1. Press the OPTIONS key.2. Use the control knob to highlight TIME SAVING. 3. Press the SELECT key. 4. Use the control knob to highlight
18Opening the door/Loading the washing1. To open the door: carefully pull the handle on the door.2. Unfold the washing and load it loosely into the ma
19Adding detergent/conditionerImportant: Only use detergents/conditioners that are suitable for use in domestic washing machines.Add detergent/conditi
2Dear customer,Please read this User Information carefully and keep it to refer to at a later date.Pass this User Information on to any subsequent own
20Starting a programme 1. Check that the water tap is open.2. Press the START key. The wash cycle is started.Programme progress While the programme is
21Washing cycle complete/Removing the washingAt the end of the programme PLEASE TAKE OUT THE CLOTHES appears in the display. As soon as the § symbol a
22Setting extra optionsIndependent of any programme you can set different basic settings. These basic settings will permanently remain active until th
23 4. Highlight the SENSITIVE option.5. Press the SELECT key.The symbol will appear in the display.6. Press the EXTRAS key. MEMORY is highlighted:7.
24RINSE+, GENTLE SPIN1. Press the OPTIONS key.2. Press the EXTRAS key. 3. Use the control knob to highlight the desired Extra, e.g. RINSE+. 4. Press t
25VOLUME1. Press the OPTIONS key.2. Press the EXTRAS key.3. Use the control knob to highlight VOLUME.4. Press the SELECT key. 5. Use the control knob
26Cleaning and maintenanceImportant! Do not use furniture care products or aggressive cleaners to clean the appliance. Wipe control panel and body wit
27What to do if...Remedying small malfunctions yourselfIf one of the following fault messages is shown in the display during operation:– ATTENTION (E4
28The drain pump runs constantly, even when the machine is switched off.ATTENTION (EF3) /PLEASE CALL YOUR LO-CAL SERVICE FORCE appears in the display.
29The display goes out while a wash cycle is running.Power cut.For safety reasons, the door will remain locked for ap-prox. 4 minutes.The programme wi
3ContentsOperating Instructions. . . . . . . . . . . . . . . . . . . . . . . . . . . . . . . . . . . . . 5Safety . . . . . . . . . . . . . . . . . . .
30If the wash results are not satisfactoryWashing is grey and scale is being deposited in the drum• Too little detergent is being used.• The right det
31Carrying out an emergency drain1 Warning! Before emergency draining, switch off the washing machine and remove the mains plug from the socket.Warnin
32Drain pumpThe drain pump is maintenance-free. It is only necessary to open the pump cover if there is a malfunction and water is no longer being pum
33Technical data5This appliance conforms with the following EU Directives:– 73/23/EEC dated 19.02.1973 Low Voltage Directive– 89/336/EEC dated 03.05.1
34Installation and connection instructions1 Safety information for the installation• This washing machine cannot be built-in.• Before using for the fi
35Installing the applianceTransporting the appliance1 Warning! The washing machine is very heavy. Risk of injury. Be careful when lifting.• Do not lay
363 Special spanner A and sealing caps B (2 off) and C (1 off) are supplied with the appliance.3. Remove screw D with its compres-sion spring using sp
37If the appliance is to stand on a plinth: In order for the appliance to be se-cure on the plinth, fixing plates*) must be mounted, into which the a
38Electrical connectionDetails about the voltage, type of supply and the fuses required are to be found on the rating plate. The rating plate is next
39Water inflowA 1.50 m long pressure hose is supplied with the appliance. If a longer water inlet hose is required, only original hoses are to be used
4Setting extra options . . . . . . . . . . . . . . . . . . . . . . . . . . . . . . . . . . . . . . . . . . . 22MEMORY. . . . . . . . . . . . . . . .
40Water drainageThe maximum permitted difference between the height of the surface on which the appliance is installed and the water outlet is 1 metre
41Guarantee/Customer ServiceFurther after-sales service agencies overseasIn these countries our AEG agents’ own guarantee conditions are appli-cable.
42CyprusHadjikyrlakos & Sons Ltd.Prodromou 121P.O. Box 21587Nicosia 1511Service Telephones:Nicosia 02 481226Limassol 05 562182Larnaca 04 633929Pap
43ServiceIn the event of technical faults, please first check whether you can remedy the problem yourself with the help of the operating instruc-tions
From the Electrolux Group. The world´s No.1 choice.The Electrolux Group is the world´s largest producer of powered appliances for kitchen, cleaning an
5Operating Instructions1 SafetyPrior to using for the first time• Follow the ”Instructions for installation and connection”.• If the appliance is deli
6Correct use• The washing machine is only designed for the washing of normal do-mestic laundry at home. •Additions or modifications to the washing mac
7Switching on the appliance for the first time – setting the languageWhen switching on the appliance for the first time you should be sure to set the
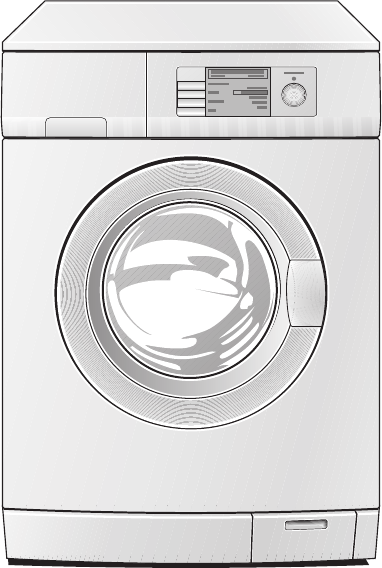
8Description of the appliance Control panel with display Indicators in the display Drawer for detergent andconditionerThree screw feet (height adjusta
9Main control featuresControl knobSwitching the appliance on and off Press the control knob to switch the appliance on and off.Highlighting You can hi
More documents for Washing machines AEG Electrolux LAVALOGIC1820


Related products and manuals for Washing machines Aeg-Electrolux LAVALOGIC1820
 (40 pages)
 (36 pages)
 (52 pages)
 (76 pages)
 (36 pages)
© 2020, manymanuals.com. All rights reserved. | 1.959 s |
 Manymanuals.com
 Manymanuals.de
 Manymanuals.fr
 Manymanuals.it
 Manymanuals.pl
 Manymanuals.cz
 Manymanuals.es
 Manymanuals-pt.com
Comments to this Manuals