Aeg-Electrolux E3000-4-B User Manual
Browse online or download User Manual for Unknown Aeg-Electrolux E3000-4-B. Aeg-Electrolux E3000-4-W User Manual
- Page / 36
- Table of contents
- BOOKMARKS
- COMPETENCE E3000-4 1
- 1 Safety instructions 2
- 3 Useful tips and hints 2
- 2 Environmental information 2
- Contents 3
- Operating Instructions 5
- 3 Information on acrylamides 5
- 3 Note on enamel coating 6
- Disposal 7
- 2 Old appliance 7
- Description of the Appliance 8
- Oven Features 9
- Oven accessories 9
- Initial Cleaning 10
- Using the Rings 11
- Setting the heat setting 12
- Using the Oven 13
- 3 Cooling fan 13
- Oven Functions 14
- 3 Anti-tip device 15
- Uses, Tables and Tips 16
- Baking table 19
- Tips on baking 21
- Table for Bakes and Gratins 22
- Frozen Ready Meals Table 22
- Roasting 23
- Roasting table 23
- Grill Sizes 25
- Grilling table 25
- Defrosting 26
- Defrosting table 26
- Making Preserves 27
- Preserves table 27
- Cleaning and Care 28
- Shelf Support Rails 29
- Oven Lighting 30
- Oven Ceiling 31
- Oven Door 32
- Oven door glass 33
- What to do if … 34
Summary of Contents
COMPETENCE E3000-4Built-In Electric OvenOperating Instructions
10Before Using for the first timeInitial CleaningBefore using the oven for the first time you should clean it thoroughly. 1 Caution: Do not use any ca
11Using the Rings3Also refer to the operating instructions for your built-in hob. It con-tains important information on ovenware, operation, cleaning
12Setting the heat setting1. Select the heat setting. 2. To end the cooking process, turn back to the Off position.
13Using the OvenSwitching the Oven On and Off 1. Turn the oven functions dial to the desired function.2. Turn the temperature selector to the desired
14Oven FunctionsThe oven has the following functions:Oven function ApplicationHeating element/fanLight Using this function you can light up the oven
15Inserting the Shelf and Tray3 Anti-tip deviceAll slide-in units have a small bulge on the left and right. This bulge is an anti-tip device and must
16Uses, Tables and TipsCooking tableThe information given in the following table is for guidance only.Heat set-tingCooking-processsuitable forCooking
173 We recommend when boiling or searing foods using the highest heat setting at first and then letting foods requiring a longer cooking time finish c
18General Instructions• Insert the tray with the bevel at the front.• With Conventional or Fan-assisted circulation you can also bake with two tins
19Baking tableType of bakingOvenfunctionShelf positionTempera-ture °CTimeHours mins.Baking in tins Ring cake or brioche Fan-assisted circulation1 150-
2Dear Customer,Please read these user instructions carefully and keep them to refer to later.Please pass the user instructions on to any future owner
20Fruit flans (made with yeast dough/sponge mixture)2)Fan-assisted circulation3 150 0:35-0:50Fruit flans (made with yeast dough/sponge mixture)Convent
21 Tips on baking Rolls Fan-assisted circulation3 1601)0:20-0:35Rolls Conventional 3 1801)0:20-0:35Small cakes (20per tray) Fan-assisted circulation3
22Table for Bakes and Gratins Frozen Ready Meals Table Dish Oven functionShelf positionTempera-ture°CTimeHours mins.Pasta bake Conventional 1 180-200
23RoastingOven function: Conventional or RotithermRoasting dishes• Any heat-resistant ovenware is suitable to use for roasting (please read the manuf
24PorkShoulder, neck, ham joint1-1.5 kg Rotitherm 1 160-180 1:30-2:00Chop, spare rib 1-1.5 kg Rotitherm 1 170-180 1:00-1:30Meat loaf 750 g-1 kg Rotith
25 Grill SizesOven function: Grill or Dual gril with maximum temperature setting1 Important: Always grill with the oven door closed.3 The empty oven
26DefrostingOven function: Defrost (no temperature setting)• Unwrap the food and place it on a plate on the oven shelf.• Do not cover with a plate or
27Making PreservesOven function: Bottom heat• For preserving, use only commercially available preserve jars of the same size.• Jars with twist-off or
28Cleaning and Care1Warning: For cleaning, the appliance must be switched off and cooled down.Warning: For safety reasons, do not clean the appliance
29Shelf Support RailsThe shelf support rails on the left and right hand sides of the oven can be removed for cleaning the side walls.Removing the shel
3ContentsOperating Instructions. . . . . . . . . . . . . . . . . . . . . . . . . . . . . . . . . . . . . 5Safety instructions. . . . . . . . . . . . .
30Oven Lighting1 Warning: Risk of electric shock! Prior to changing the oven light bulb:– Switch off the oven!– Disconnect from the electricity supply
31Oven CeilingThe upper heating element can be folded down to make it easier to clean the oven ceiling.Folding down the heating ele-ment1 Warning: Onl
32Oven DoorThe door of your appliance may be removed for cleaning.Removing the oven door1. Open the oven door completely.2. Completely fold back the c
33Oven door glassThe oven door has two glass plates, set next to each other. The inner plate can be removed for cleaning. 1 Caution: the following st
34What to do if … If you are unable to remedy the problem by following the above suggestions, please contact your dealer or the Customer Care De-partm
35ServiceIn the event of technical faults, please first check whether you can remedy the problem yourself with the help of the operating instruc-tions
From the Electrolux Group. The world´s No.1 choice.The Electrolux Group is the world´s largest producer of powered appliances for kitchen, cleaning an
4Cleaning and Care . . . . . . . . . . . . . . . . . . . . . . . . . . . . . . . . . . . . . . . . . . . . . . 28Outside of the appliance. . . . . . .
5Operating Instructions1 Safety instructions5This appliance conforms with the following EU Directives:– 73/23/EEC dated 19.02.1973 Low Voltage Directi
6How to avoid damage to the appliance• Do not line the oven with aluminium foil and do not place baking trays, pots, etc. on the oven floor, as the he
7Disposal2Packaging materialThe packaging materials are environmentally friendly and can be recy-cled. The plastic components are identified by markin
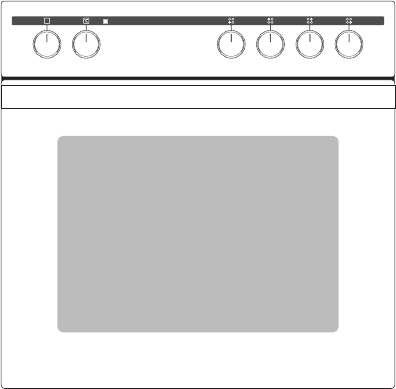
8Description of the ApplianceGeneral Overview Control Panel Full glass doorControl panelDoor handleTemperature Pilot LightOven FunctionsTemperature se
9Oven Features Oven steam vent The steam from the oven is fed di-rectly upwards via the duct in the rear of the cooking surface.Oven accessoriesCombi
More documents for Unknown AEG Electrolux E3000-4-B


Related products and manuals for Unknown Aeg-Electrolux E3000-4-B
 (36 pages)
 (48 pages)

 (64 pages)
 (32 pages)
 (32 pages)


 (232 pages)
 (60 pages)
 (64 pages)
 (32 pages) (56 pages)
© 2020, manymanuals.com. All rights reserved. | 4.858 s |
 Manymanuals.com
 Manymanuals.de
 Manymanuals.fr
 Manymanuals.it
 Manymanuals.pl
 Manymanuals.cz
 Manymanuals.es
 Manymanuals-pt.com
Comments to this Manuals